Wednesday, 17 September 2014

Leaves 2

One of the reasons that my craft studio gets so cluttered is that I don't like to throw things away ... so Instead of just throwing the negative die cut of my leaves, I decided to use it on another card. So this is my second card for the SSS Flickr Challenge #1.

I wanted to put green behind the stencil, so I sprayed some cardstock with Mister Huey Cash Money. Then I stamped the Hero Arts La Lettre stamp in HA Silver on the green. I also stamped the white card in 2 opposite corners.

I had my stash of SSS stamp sets next to me and Favorite Flowers was on the top. I realised that the doodle leaf stamp would fit in the larger leaves perfectly. I love it when a plan comes together! I added a freehand doodle line to frame it.


There is some sort of optical illusion going on here, as no matter how many times and ways I try to photograph it, the leaves look like they are in front of the orange/yellow background, when in fact, it is the reverse!

And guess what?

There is still some of that negative cut left, so another card is in the making!

Welcome Baby

For the Pattern Paper Challenge of Virginia and the A Blog Named Hero : Patterned Paper Challenge.


Leaves 1

Simon Says Stamps have started a new competition on their SSS Flickr Group. Yay!

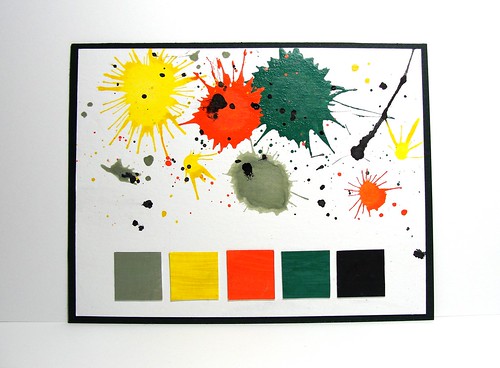
The challenge is to use at least 3 of the 5 colours - and to use an exclusive SSS product.


I started off by inking up some paper with Distress Inks then splattering over some Silver Distress paint, and die cutting with the Clustered Leaves Craft die. On the background I used the Leaf stencil and sprayed with Mister Huey Cash Money spray. I then stamped the Hero Arts La Lettre stamp with HA Silver ink. When I glued the diecut down, I offset it off the stenciled shape to give light above it.


Here is a close up of the offset, and silver splatters.


Tuesday, 16 September 2014

THANK YOU so much

My album of our wonderful trip arrived today! I decided to make one printed album as we had over 2700 photos to choose from - I think I picked about 524 and the album ended up being 132 pages.  (I will be making scrapbook pages of the really special photos.) I made this card to go with the album to thank my husband for a dream come true.

I first painted the background with watercolours. I stamped the map and travel icons in brown, and the rest in black. I stamped the Thank You with Versamark ink and embossed in white. I added black shadow lines to make it stand out more.


Just a taste of our trip .... Edinburgh for my daughter's Graduation


Off to Italy ... Rome, Florence & Tuscany ...


A last stop in Venice ...


Glorious last night!


Monday, 15 September 2014

Tagged ... in Getting to Know Me Blog Hop

I was tagged by Chark of Glitter in my Kitchen for the Getting to Know Me Blog Hop. We answer a few crafty questions, then tag some more to play the following week.

So here are the QUESTIONS ...

1) What Creative Projects are you currently working on?

I often have too many projects on the go at once ...
... playing with new stamps and seeing how many different ways I can use them.
... at the moment I have partly finished a twinchie wall piece which I started over a year ago. It's going to take 96 to finish it - so much bigger than my first one! (You can do a "twinchie" search to see them on my blog)
... an art journal for my favourite verses that hasn't got passed the 2nd page
... THREE travel albums (an altered folder album for my second daughter's trip on her way to her first year of university; a handmade album for a wonderful trip around Scotland with my eldest daughter; and a big scrapbook for our amazing family trip to Scotland and Italy this year)
... the many challenges by blogs - so many that I had to make myself a schedule!
... I have finished a queen-size Tunisian blanket, and am almost finished the throw that started as a baby blanket to use up the leftover wool, but the wool kept going on!
My biggest block at the moment is the mess that is my craft studio!! I know I should be tidying up, but when I do get out there, all I want to do is create.


2) How does my work differ from others in my genre?

I don't think I have one particular style, nor do I just do just one craft. On the stamping side, I love CAS designs, but love techniques too. For scrapbooking, I like the photos to be the focus; and I think I'm enjoying mini albums more than big 12x12 pages these days (perhaps because I know they have a beginning and an end and come in small bite size pieces). I love all paper crafts ... packets, boxes, ATC's, wrapping, Advent calenders, decoupage.

3) Why do I create what I do?

Because I love playing with paper, inks, stamps and stencils. I get lost in my world of creativity - it's fun, calming and so satisfying.  I love the scrapping side as I know it will last longer than a card, and it passes on our story.

4) How does my creative process work?

It depends on what I'm doing and what is the focus of the project.
- Am I wanting to use a particular product (stamp, ink, paper, etc)?
- Do I want to do a particular technique?
- Am I following a challenge (colour, sketch, theme)?
- Is it for a particular person?
- But in scrapping it is almost always the photos, and the story I want to tell, that starts me off.

5) Who am I tagging next?

I have asked 2 more wonderfully creative ladies to join in:
Deborah Nolan, whose blog S.O.S. Society of Stampaholics brings much creative inspiration as well as smiles. She has a great sense of humour (one of my all time favourite Christmas crafting stories! - sorry Deborah that Vivi was tough on you, but you brought us laughter with your story). Deborah is a member of the Design Teams for Memory Box and The Craft's Meow, and a staffer at Scrapbook News & Review. She also runs a monthly card chain challenge in which you get to send and receive a real card - how awesome is that!
Claire Barrin, aka Luckie, runs 2 blogs ... one in English and the other in French. I love the lightness and artistic touch in her scrapbook pages - how she uses stamps, stencils, paints and embellishments. She is on 5 Design Teams : éphéméria, Scrap FX, Scrap idees, Just Create and Scrap and Jas'piration Scrap.
Be sure to check their blogs next Monday when they will answer the same questions.



Sunday, 14 September 2014

Enjoy life

Finally made it into my studio this weekend. So many lovely challenges out there ... spent too much time surfing blogs!

This card combines the challenges Color Throwdown, Muse and CASology.


Some embossing paste mixed with Tumbled Glass ink over the stencil I made from the Hero Arts Triangle Background diecut. I dabbed some Silver Distress Paint on my craft mat, then took some up with a paint brush and splattered over the butterflies which had been distressed with Broken China and Hero Arts Lime ink.

I will also enter it for the Simon Says Stamp Make your own Background Challenge.

Sunday, 7 September 2014

Hosting the Card Scramble

It was my turn to host the Hero Arts Flickr Group card scramble this week.

I decided that the theme would be to use pages from a book on the card. It could be stamped, diecut, embossed, whatever you wanted.

I made 4 examples. The first was to use the paper as a background with neutral stamping.


The second card, I stamped on the book paper again, but this time I coloured in the image with Prisma coloured pencils. I used the same stamp as the background, matching the pattern.


The next card, I diecut many butterflies and distressed the edges, alternating the colours. The top die was also stamped, adding Wink of stella to the dots. I inked up the background grid stamp using distress markers, using Picked Raspbery on 2 sides of the squares, and Ripe Persimmon on the other 2. Spritzed it generously before stamping.


A close up of the layers of wings, and shimmer on the dots.


The last card, I used an embossing folder on the book page. The embossing was not that noticeable, so I sponged over it with Distress Ink to make it stand out more. I used the Hero Arts branch die, and flowers, adding Liquid Pearl yellow dots. (I was so happy the "Ebersole" was in the writing as I'm a fan of Julie Ebersole's cards, videos and laughter!)


A closeup of the dry embossing.


Thursday, 4 September 2014

WPlus 9 : More Fresh Cuts 3, 4 & 5

On a roll this morning with this stamp set.

Card 3 : Group flowers as the centre point of the card. Use Copic blending pen to shade out areas of the petals. (You can do this with WPlus 9 and Hero Arts midtone inks)


Card 4 : Create an off-centre, asymetrical grouping on kraft, embossing in white to add contrast. The sentiment is PTI.


Card 5 : Repeat the flowers across the card. Make the heights vary by doubling up on the foliage image. The paper trims were white cardstock that I inked up with the same inks I used on the flowers. That way you get a perfect match. (Thanks again, Bronwyn!) And another card save .... I had 3 green smudges which were carefully covered with dragonflies.


WPlus 9 : More Fresh Cuts 2

Card number 2 with the More Fresh Cuts set, was Bronwyn's idea. Die cut a circle in your card, but leave the circle in. Stamp around the circle, overlapping the cut line. Take away the circle and stamp your sentiment on the inside, which will then show through.

A little tip : When I die cut the circle, I taped 2 pieces to washi tape to the back BEFORE I removed the die so that the circle stayed in place.

But guess what happened .... I stamped my wreath with the fold on the wrong side! So, as Heather Telford says, "no card gets left behind", I cut it and mounted it on the front. So my window doesn't go through to the inside, but still pretty.


Another card for Work it Wednesday at Simon Says Stamp.

WPlus 9 : More Fresh Cuts 1

I was asked to teach a class with WPlus 9 stamps. We used the More Fresh Cuts set, and made 4 cards. It's a great set to make a background, or your own "pattern paper".


So this is card 1 : Background print.


A lovely "Laura Ashley" print. And here is a tip when you are using ribbon and have the ends on the inside .... add a matching stamped image where the 2 ends meet. A classy touch.


Will be entering this for the Work It Wednesday Challenge at Simon Says Stamp.


Related Posts with Thumbnails